Migrating the DHCP service from the old server to the new Windows Server 2016/2019/2022 host with the saving of all the DHCP scope settings of the old server is quite easy. If the old DHCP server is running Windows Server 2008/R2 or Windows Server 2012/R2, you can directly transfer DHCP settings, zones, and DHCP reservations.
Deploying DHCP Server Role on Windows Server 2022/2019/2016
First of all, you need to install the DHCP Server role on a new server that is running Windows Server 2016/2019/2022. You can install the DHCP Server role using the Server Manager console, where you need to run the Add Roles Wizard in the Manage > Add Roles and Features menu and select the DHCP Server.
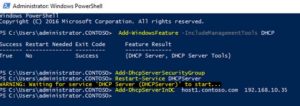
But it’s much easier to install the DHCP role and role management tools (the DHCP MMC console and PowerShell module to interact with DHCP server) using PowerShell. Run the PowerShell console as an Administrator and run the following command:
Add-WindowsFeature -IncludeManagementTools DHCP
The -IncludeManagementTools parameter must be specified to install the DHCP server management console. By default, the Add-WindowsFeature cmdlet installs only the DHCP server role without the appropriate console.
Next, you need to create local DHCP security groups (DHCP Administrators and DHCP Users):
Add-DhcpServerSecurityGroupNote. These security groups are used to manage the local DHCP server:
- DHCP Administrators — these are users with full permissions on the DHCP server (they can change any settings), but without local admin permissions on Windows Server;
- DHCP Users — users with the rights to view DHCP server settings and statistics (including the DHCP Leases info).
To enable DHCP security settings associated with the local security groups created, restart the DHCP Server service:
Restart-Service DHCPServer
Authorize DHCP Server in Active Directory
Next, you need to authorize the new DHCP server in the Active Directory domain. Authorization in Active Directory is performed under an account with Enterprise Admins permissions and is needed to prevent rogue DHCP servers from working on the network.
The list of authorized DHCP servers in the AD domain can be displayed as follows:
Get-DhcpServerInDC
To authorize the new DHCP server in the Active Directory domain:
Add-DhcpServerInDC host1.contoso.com 192.168.10.35
If you want to start a DHCP server without authorization in AD, you need to change the DisableRogueDetection registry parameter with the following PowerShell command:
Set-ItemProperty -Path "HKLM:\SYSTEM\CurrentControlSet\Services\DHCPServer\Parameters" -Name DisableRogueDetection -Value 1 -Force
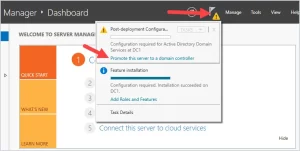
However, after the DHCP role is installed and the post-installation settings with PowerShell are performed, you can’t connect to the DHCP Server. You can see an alert message in the Server Manager console: a post-installation configuration is required, even though it has already been performed. In this case, even the server reboot won’t help to make this alert disappear.
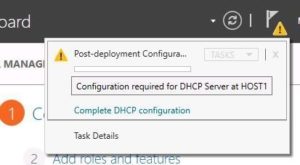
To remove this warning message and notify Server Manager that post-install DHCP configuration is completed, you need to modify the ConfigurationState registry parameter. Use the following PowerShell command to indicate that the actual DHCP server role has already been configured:
Set-ItemProperty –Path registry::HKEY_LOCAL_MACHINE\SOFTWARE\Microsoft\ServerManager\Roles\12 –Name ConfigurationState –Value 2
After that, you need to restart the DHCP service:
Restart-Service -Name DHCPServer -Force
Moving DHCP Server from Windows Server 2008/R2/2012 to 2016/2019/2022
In Windows Server 2012 special PowerShell cmdlets have been added, allowing you to import/export any DHCP server settings. Note that Microsoft simplified the procedure as much as possible, and we will need to execute only two PowerShell commands: Export-DhcpServer and Import-Dhcpserver, which can work remotely. All commands can be executed on one machine (the one to which the DHCP service migrates).
Create the folder C:\DHCP (New-Item C:\DHCP -type directory) and run the command to export the configuration of the old DHCP server to the XML file named OldDHCPConf.xml.
Export-DhcpServer -ComputerName "oldDhcp.contoso.com" -Leases -File "C:\DHCP\OldDHCPConf.xml" –Verbose
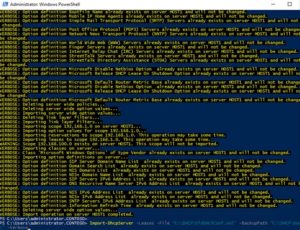
Now you can perform a full import of the DHCP configuration on the new server:
Import-DhcpServer -Leases –File "C:\DHCP\OldDHCPConf.xml" -BackupPath "C:\DHCP\Backup" –Verbose
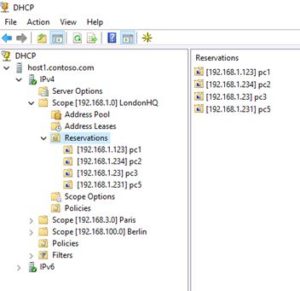
Everything is ready. Run the DHCP console and check that all the DHCP scopes, reservations, and IP leases are in place.
After the migration of the DHCP server is completed, do not forget to reconfigure the DHCP Relay (IP Helper) agents on the routing network devices. Reconfigure them to use the IP address of the new DHCP server.
When you run the command Import-DhcpServer -Leases –File…. you may get an errorGet-DhcpServerVersion : Failed to get version of the DHCP server DC3.
In this case, make sure you run PowerShell console as Administrator. Also, check if your account is a member of the local DHCP Administrators group.
Migrating the DHCP Role on Windows Server Using the Backup/Restore Feature
In Windows Server 2016+, you can backup and restore your DHCP server configuration via the graphical MMC snap-in DHCP Management (dhcpmgmt.msc). You can use these features to migrate your DHCP server.
- Open the RSAT DHCP console
- Right-click on the DHCP server and select Backup
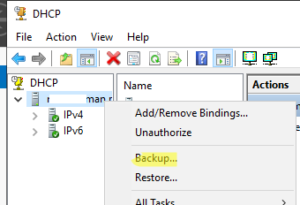
3. Specify the directory where you want to save the backup copy of the DHCP server settings.
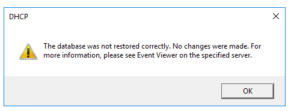
You can use this backup copy to restore the DHCP server settings on the current or another Windows Server host. However, if you simply copy the DHCP backup files to a new server and try to restore the configuration using the Restore option in dhcpmgmt.msc, an error will appear when importing the DHCP database:
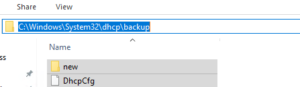
To successfully migrate your DHCP server config to a new device, you need to copy your DHCP1 backup to the %SystemRoot%\System32\DHCP\backup directory on the DHCP2 server. Then select the Restore option in the DHCP console and select to restore the configuration from this folder.
If everything was successful, the following message should appear:
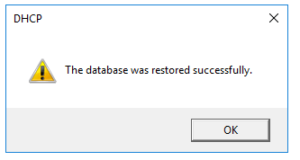
As you can see, we successfully migrated DHCP from one server to another using a DHCP backup.
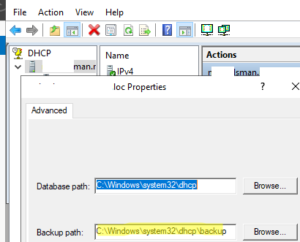
Note that by default, Windows backs up the DHCP configuration and leases every 60 minutes to the %SystemRoot%\System32\DHCP\backup directory.
The backup directory is configured in the DHCP server settings.
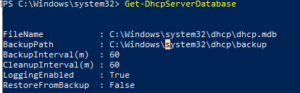
You can also list the current DHCP backup settings using the PowerShell command:
Get-DhcpServerDatabase
FileName : C:\Windows\system32\dhcp\dhcp.mdb
BackupPath : C:\Windows\system32\dhcp\backup
BackupInterval(m) : 60
CleanupInterval(m) : 60
LoggingEnabled : True
RestoreFromBackup : False
This means that if your Windows Server DHCP server fails, you can manually copy the DHCP database files from the backup directory on the failed server’s disk and restore its configuration to the new server.
DHCP Server Migration from Windows Server 2003 to 2016/2019
If you are using a legacy DHCP server on Windows Server 2003/R2, you need to use a different migration method. This is because Windows Server 2003 does not support the PowerShell cmdlets for exporting DHCP settings that are available in newer versions of Windows Server.
Log in to the Windows Server 2003 and open the command prompt. Run the following command to export DHCP server configuration to a binary file:
netsh dhcp server export C:\ps\dhcp2003_config.dat all
Now copy the dhcp2003_config.dat file to the new DHCP server running Windows Server 2016/2019 and import the configurations from a local file or over the network (using a UNC path):
netsh dhcp server import \\winsrv2003dhcp\c$\ps\dhcp2003_config.dat all
Migrating DHCP Failover Configuration
If you are using a DHCP failover or DHCP load balancing configuration, after importing the DHCP settings on the first server, you only need to import only the server configuration on the second Windows Server:
Import-DhcpServer -Leases –File "C:\DHCP\OldDHCPConf.xml" -ServerConfigOnly -BackupPath "C:\DHCP\Backup" –Verbose
After that, you need to perform the standard DHCP Failover configuration.
Remove the Old DHCP Server
Now you need to disable the DHCP service on the old server:
Stop-Service DHCPserver

Set-Service -Name DHCPServer -StartupType "Disabled"
And unauthorize the old DHCP server from Active Directory using the DHCP console (right-click on the DHCP server name > Unauthorize)
Or unauthorize your old DHCP Server in AD using the following PowerShell command:
Remove-DhcpServerInDC -DnsName "oldDhcp.contoso.com” -IPAddress 192.168.10.36
Then uninstall the DHCP Server Role:
Uninstall-windowsfeature dhcp -remove

Uninstall-WindowsFeature RSAT-DHCP
And reboot the server:
Restart-Computer -Force